In the system of the online store, it is possible to indicate options in two ways:
1. Simple option
2. Option with the product ID
To add the simple option, option types relevant to the products must be created first. Manual for creating options can be found here.
1. Adding a simple option to the product
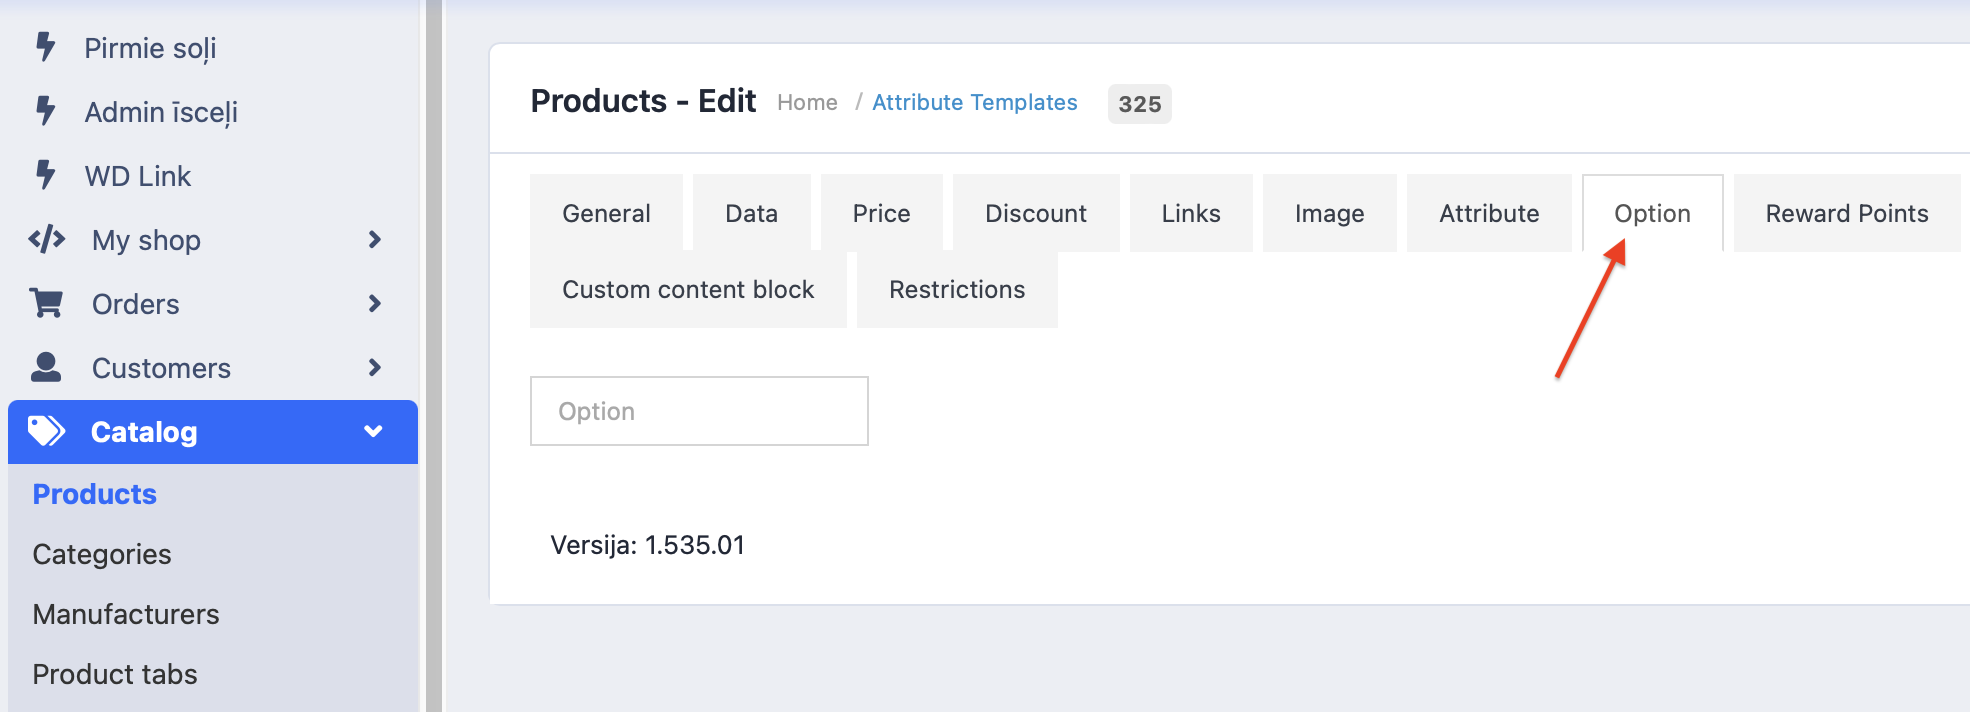
When the options have been created, head to the menu of the desired product. Select Catalogue >> Products and click the Edit button of the product. Then open the Options section.
Then click on the Options block, where the necessary variant must be chosen. Further click on the blue “+” button to indicate values.
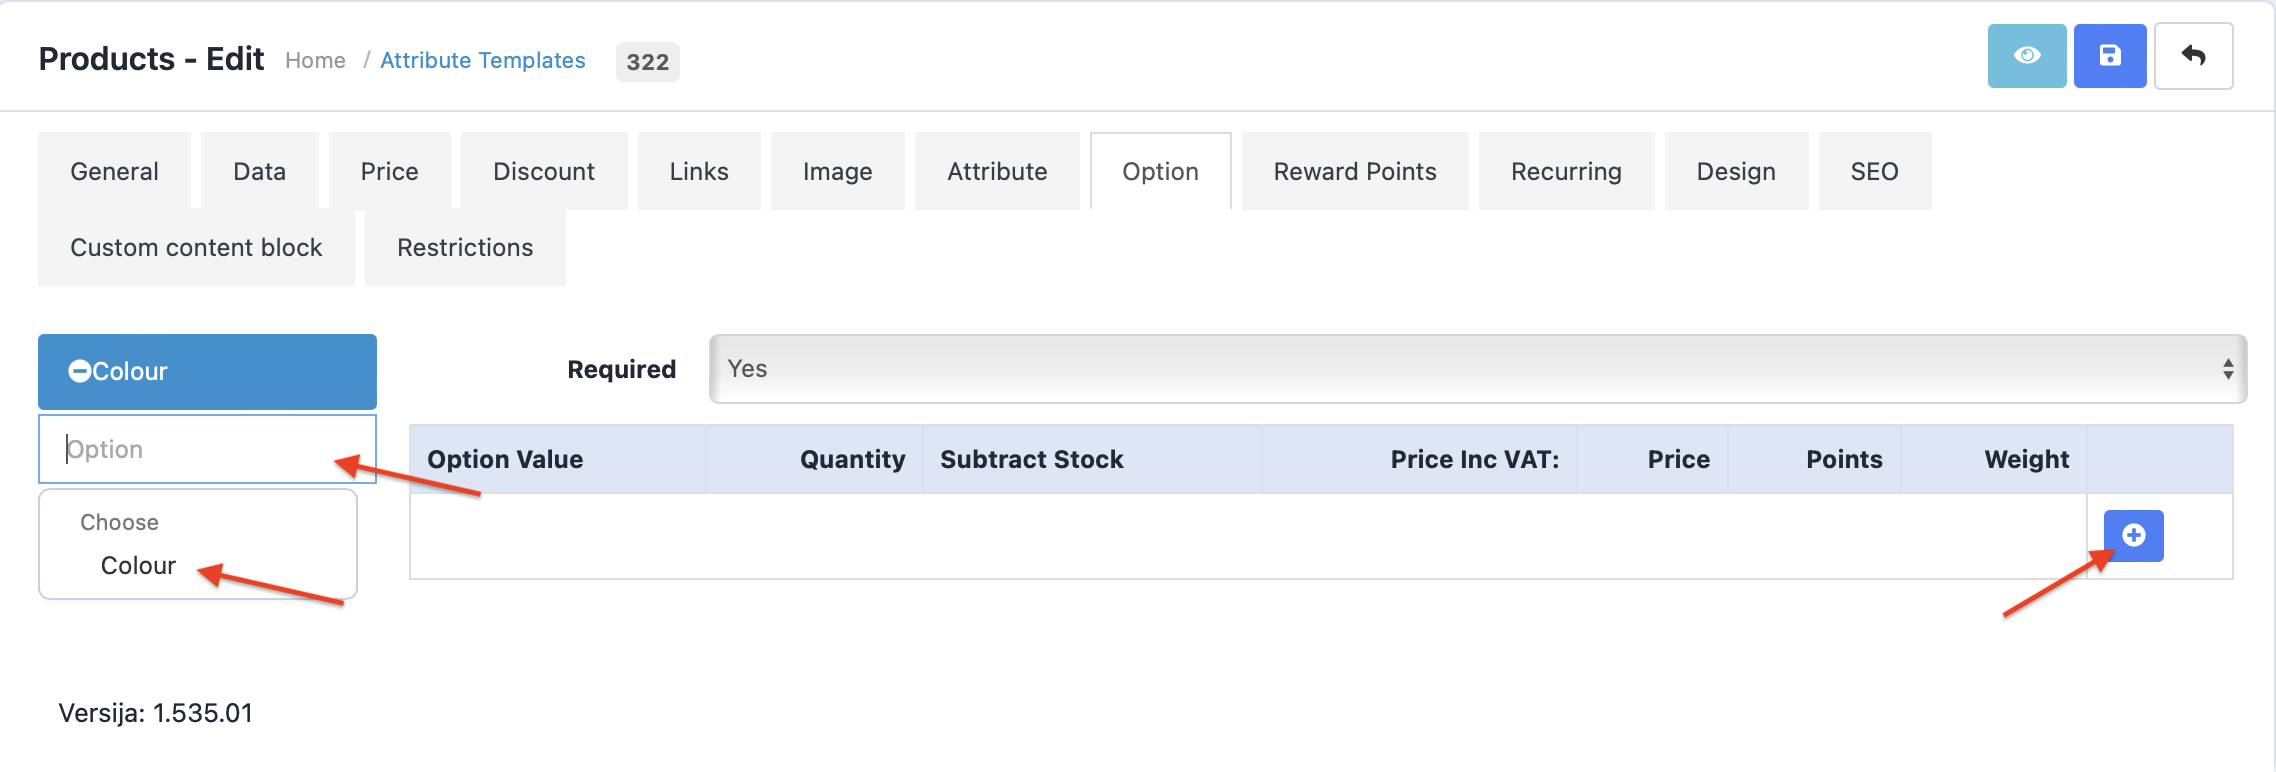
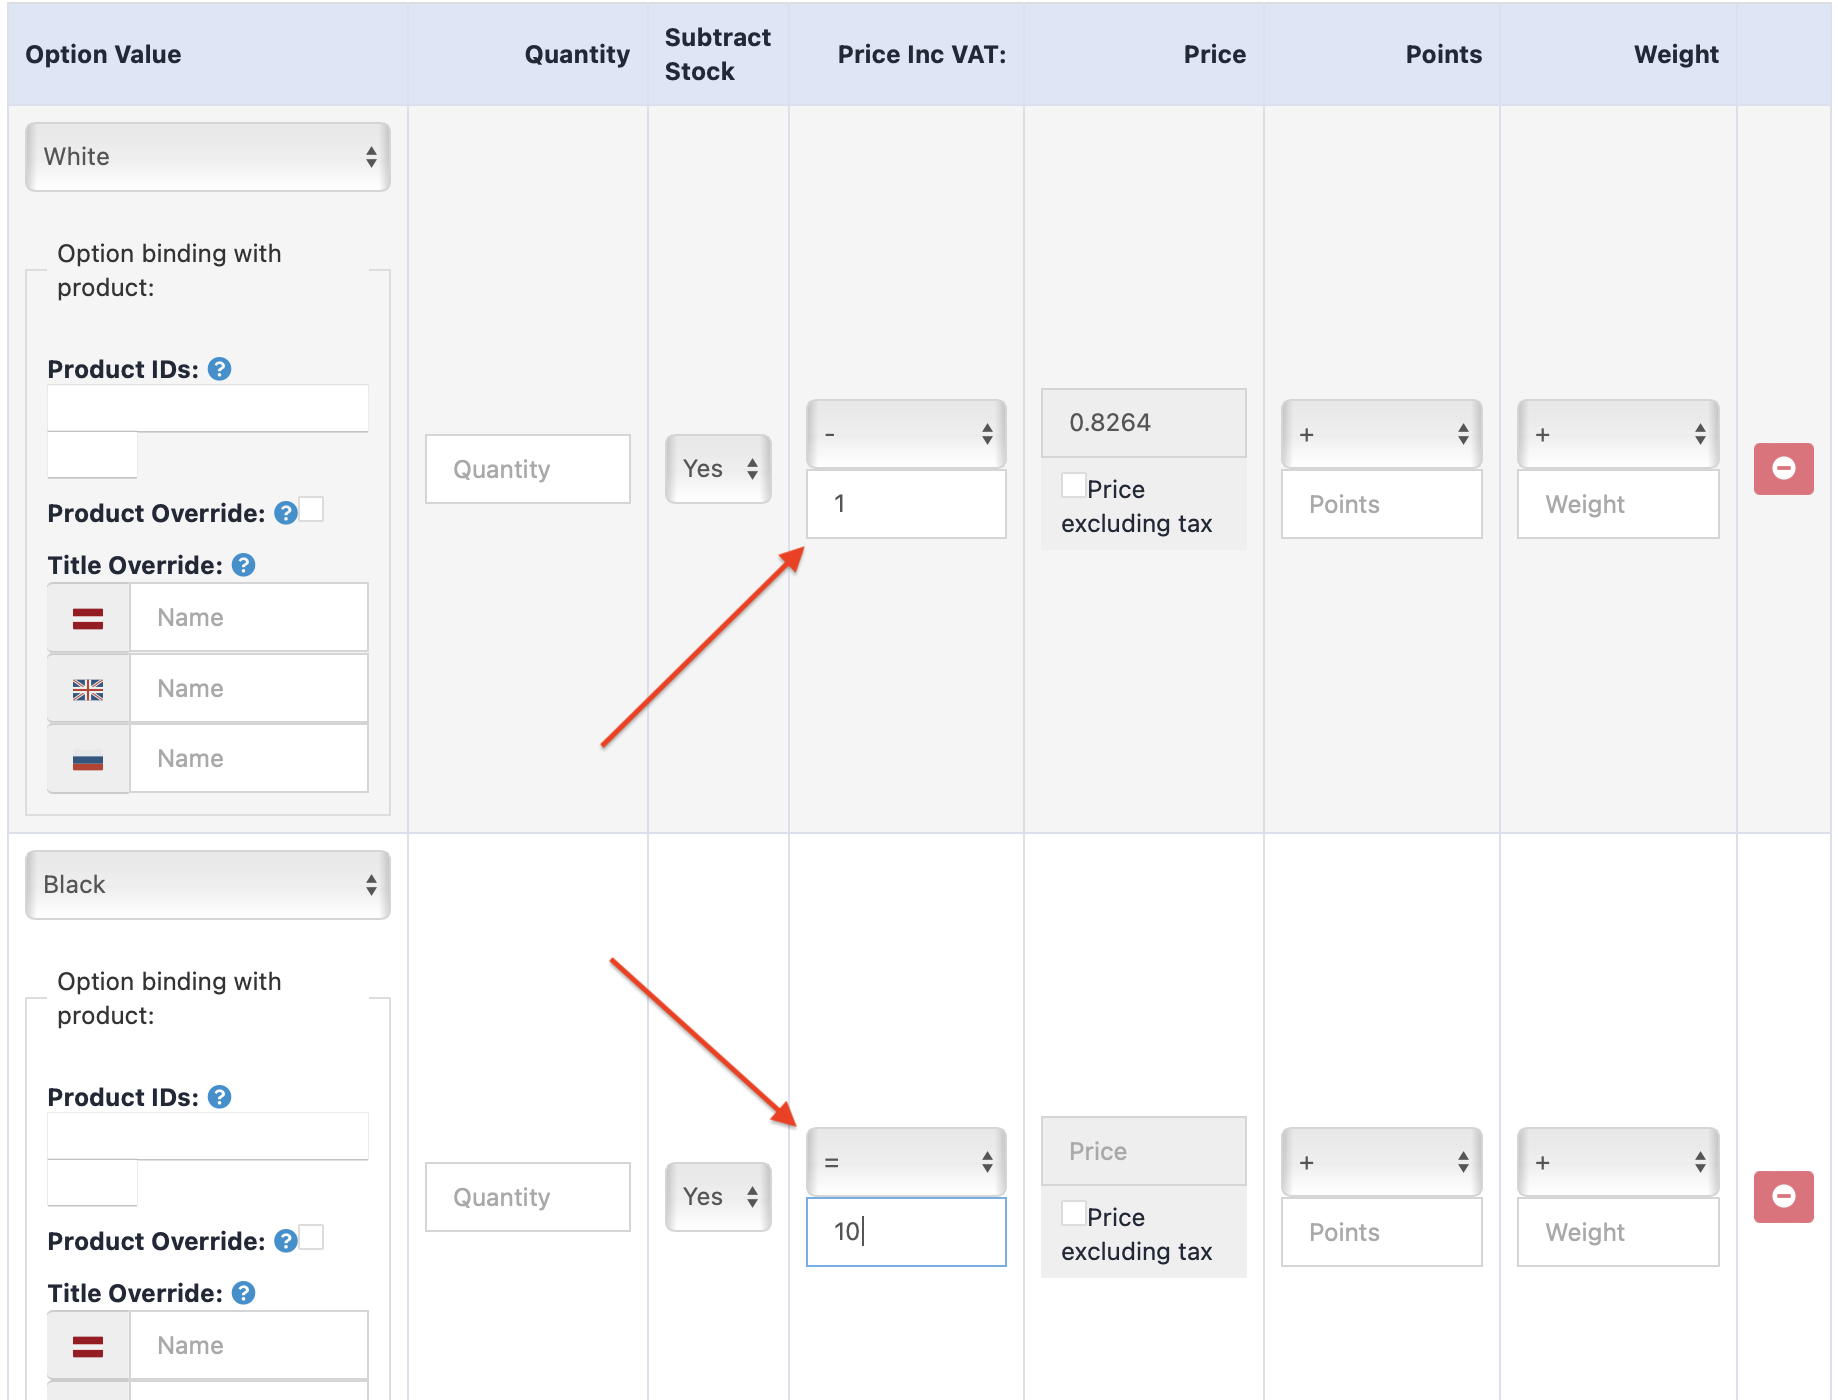
Enter the necessary options that are relevant aka available to the product.
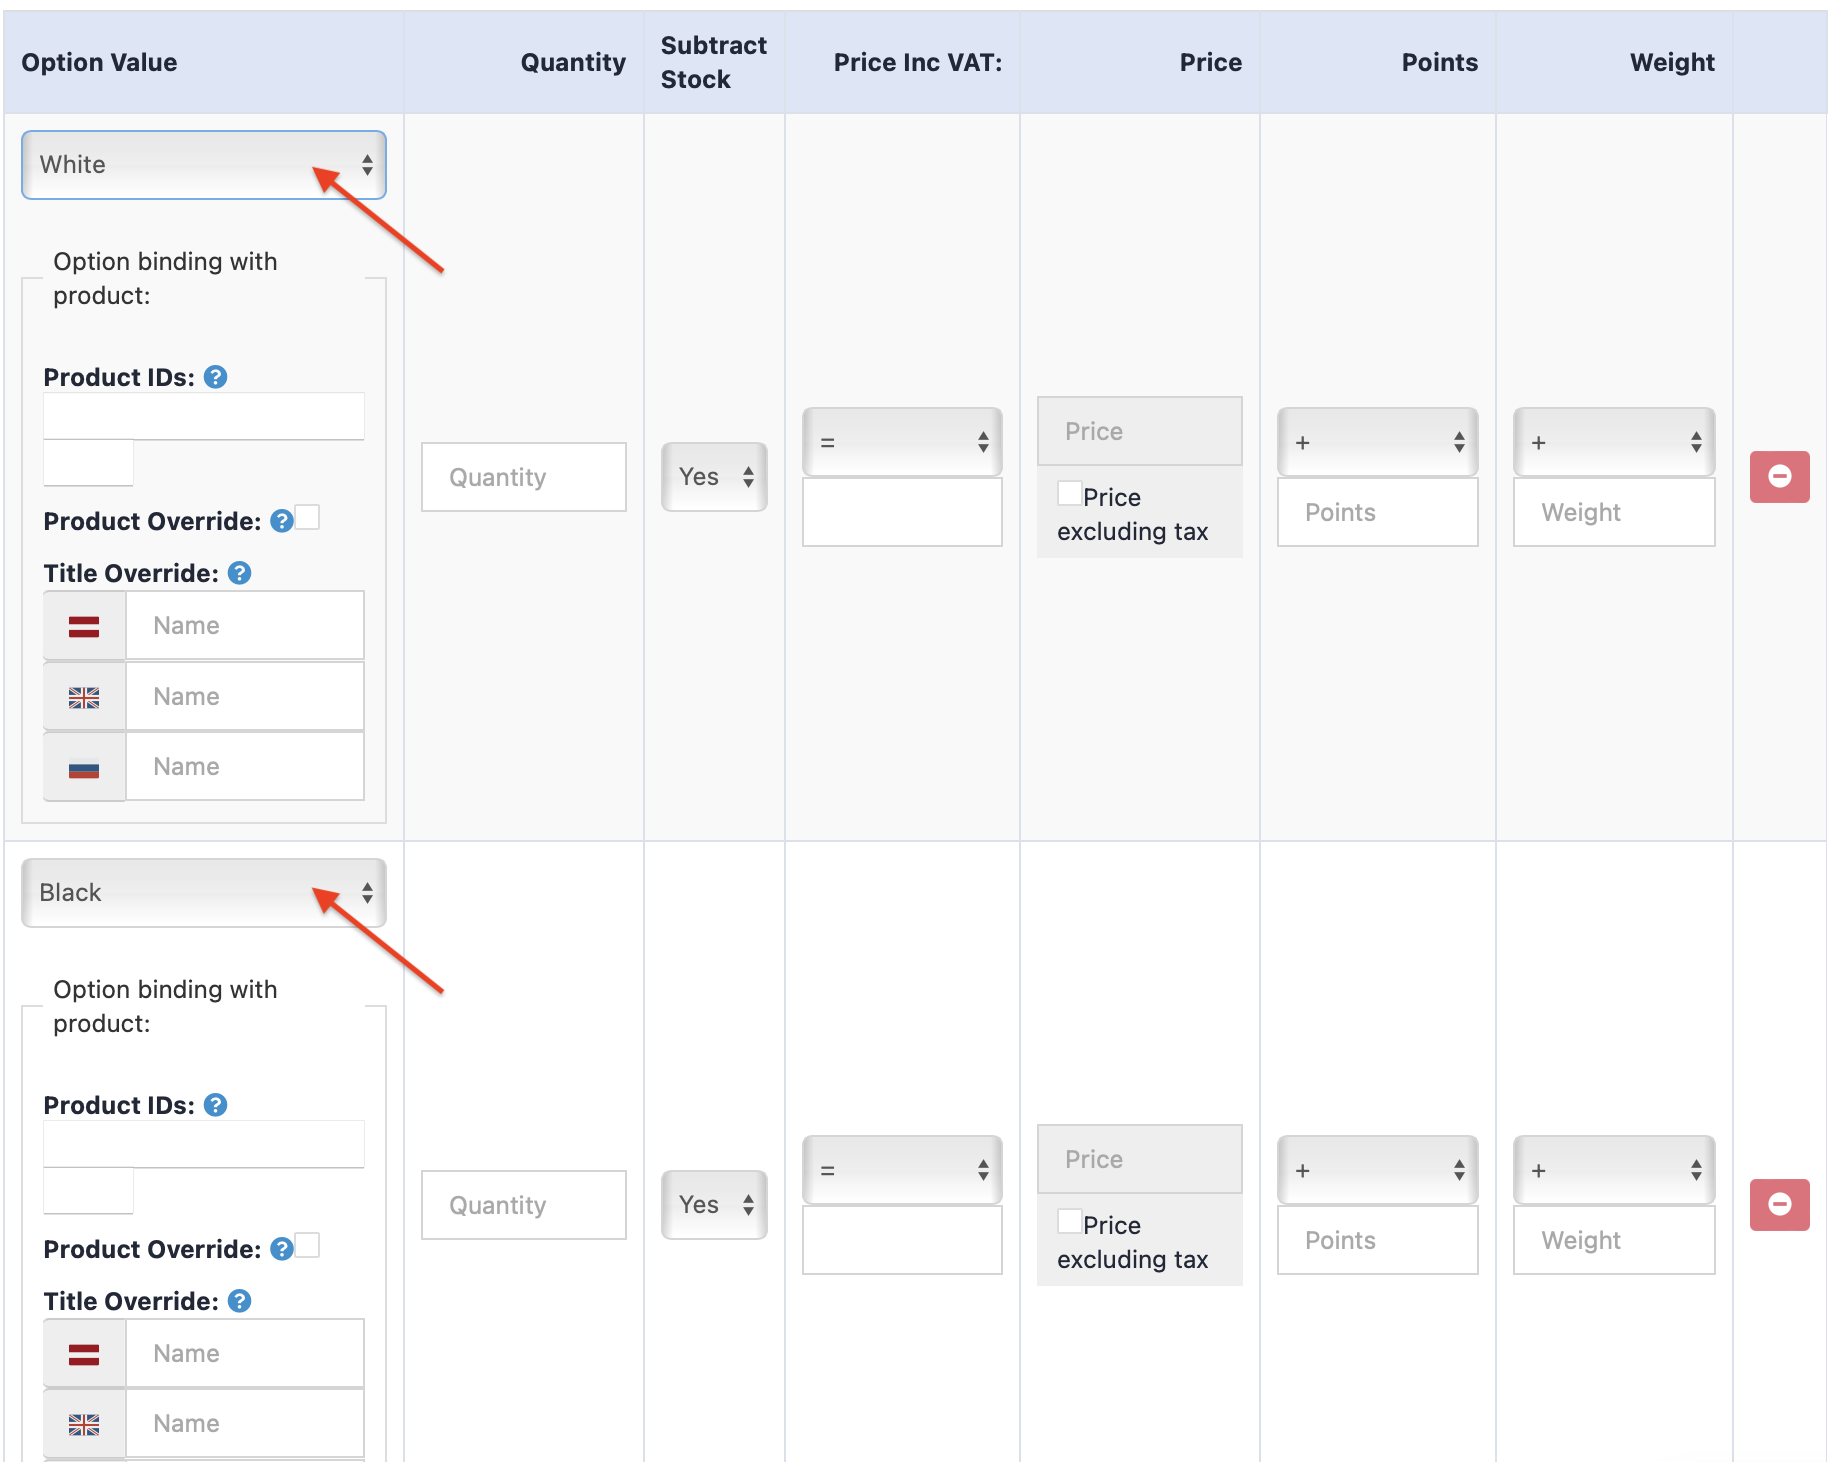
For each value You can indicate the available amount, weight and, most importantly, the price – whether it will be more, less or the same.
If the products’ option price is higher, then select the fields + symbol and enter the price difference. For example, if the base product costs 10 EUR, but in white it is 11 EUR, then by indicate +1 by the option. However, if the Black variant costs the same as the base product, then enter =10. If the price is lower, then enter the – symbol and the difference.
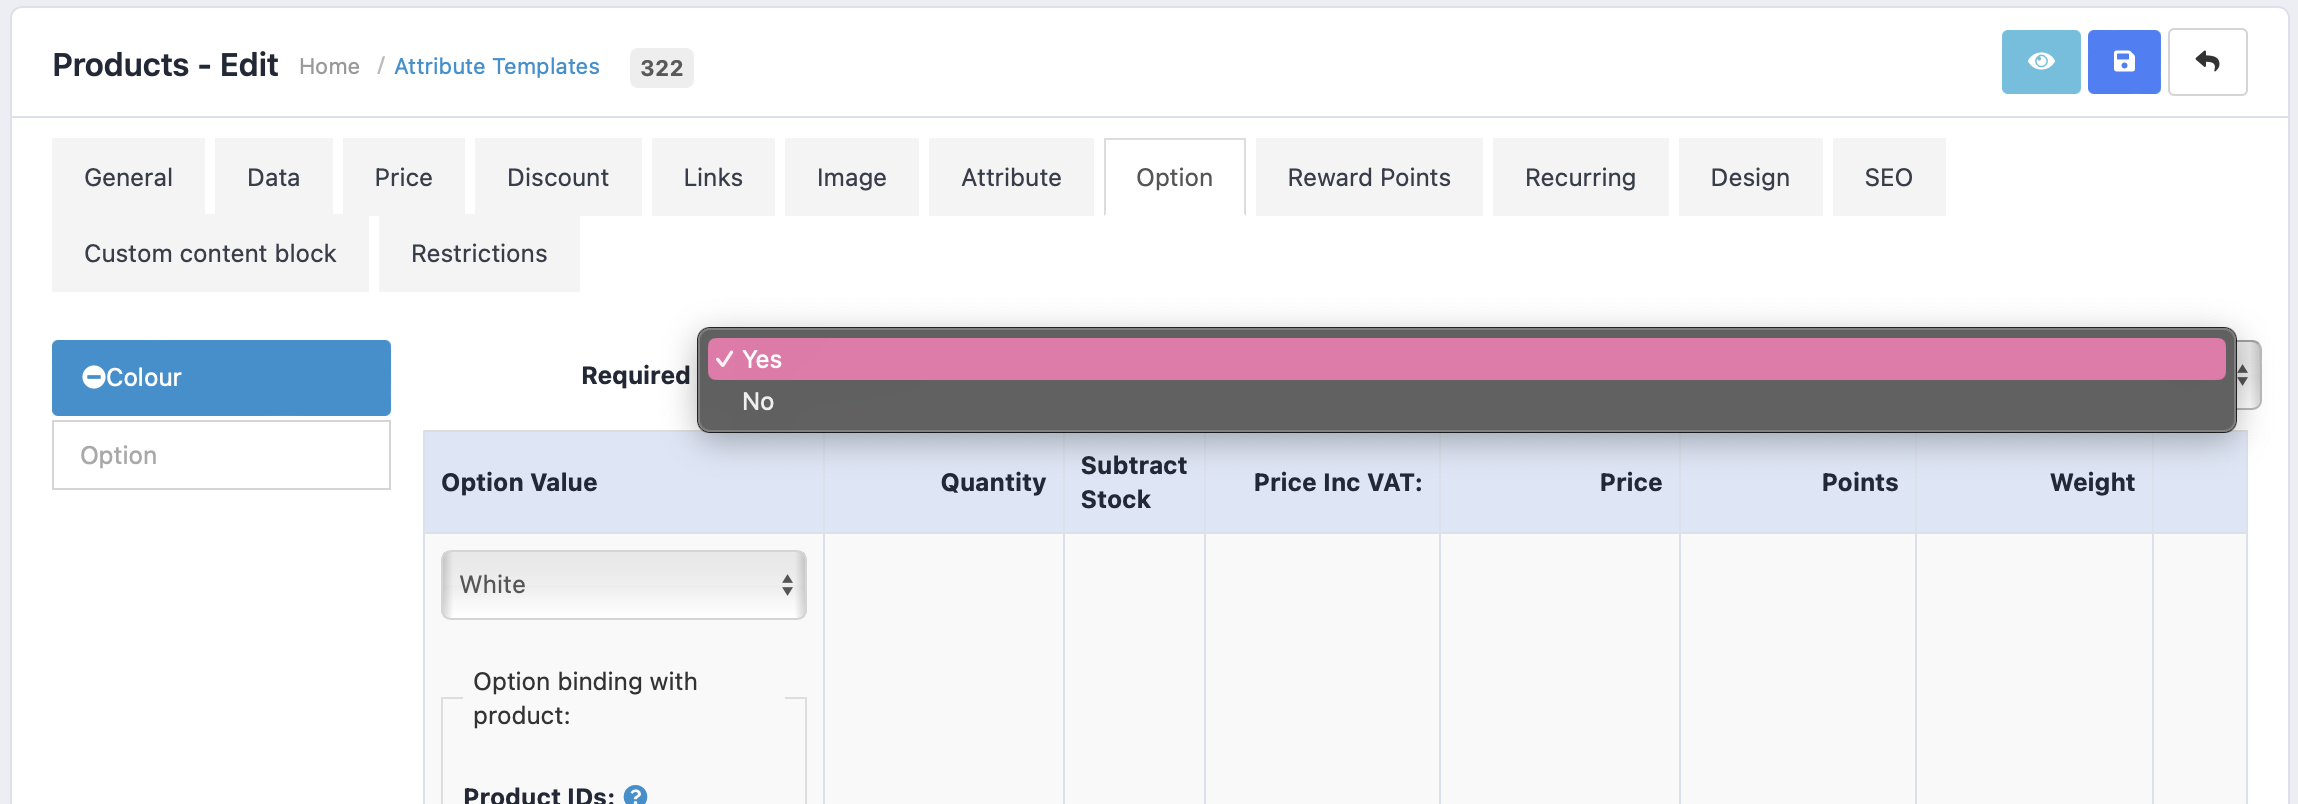
You can also enter multiple options, for example, colour, size, material etc. Also, for each option You can indicate whether it is mandatory, when buying a product. If it must be selected, then the client will not be able to add the product without selecting the necessary option.
2. Option with the product ID
To add an option product to the item, this must be done.
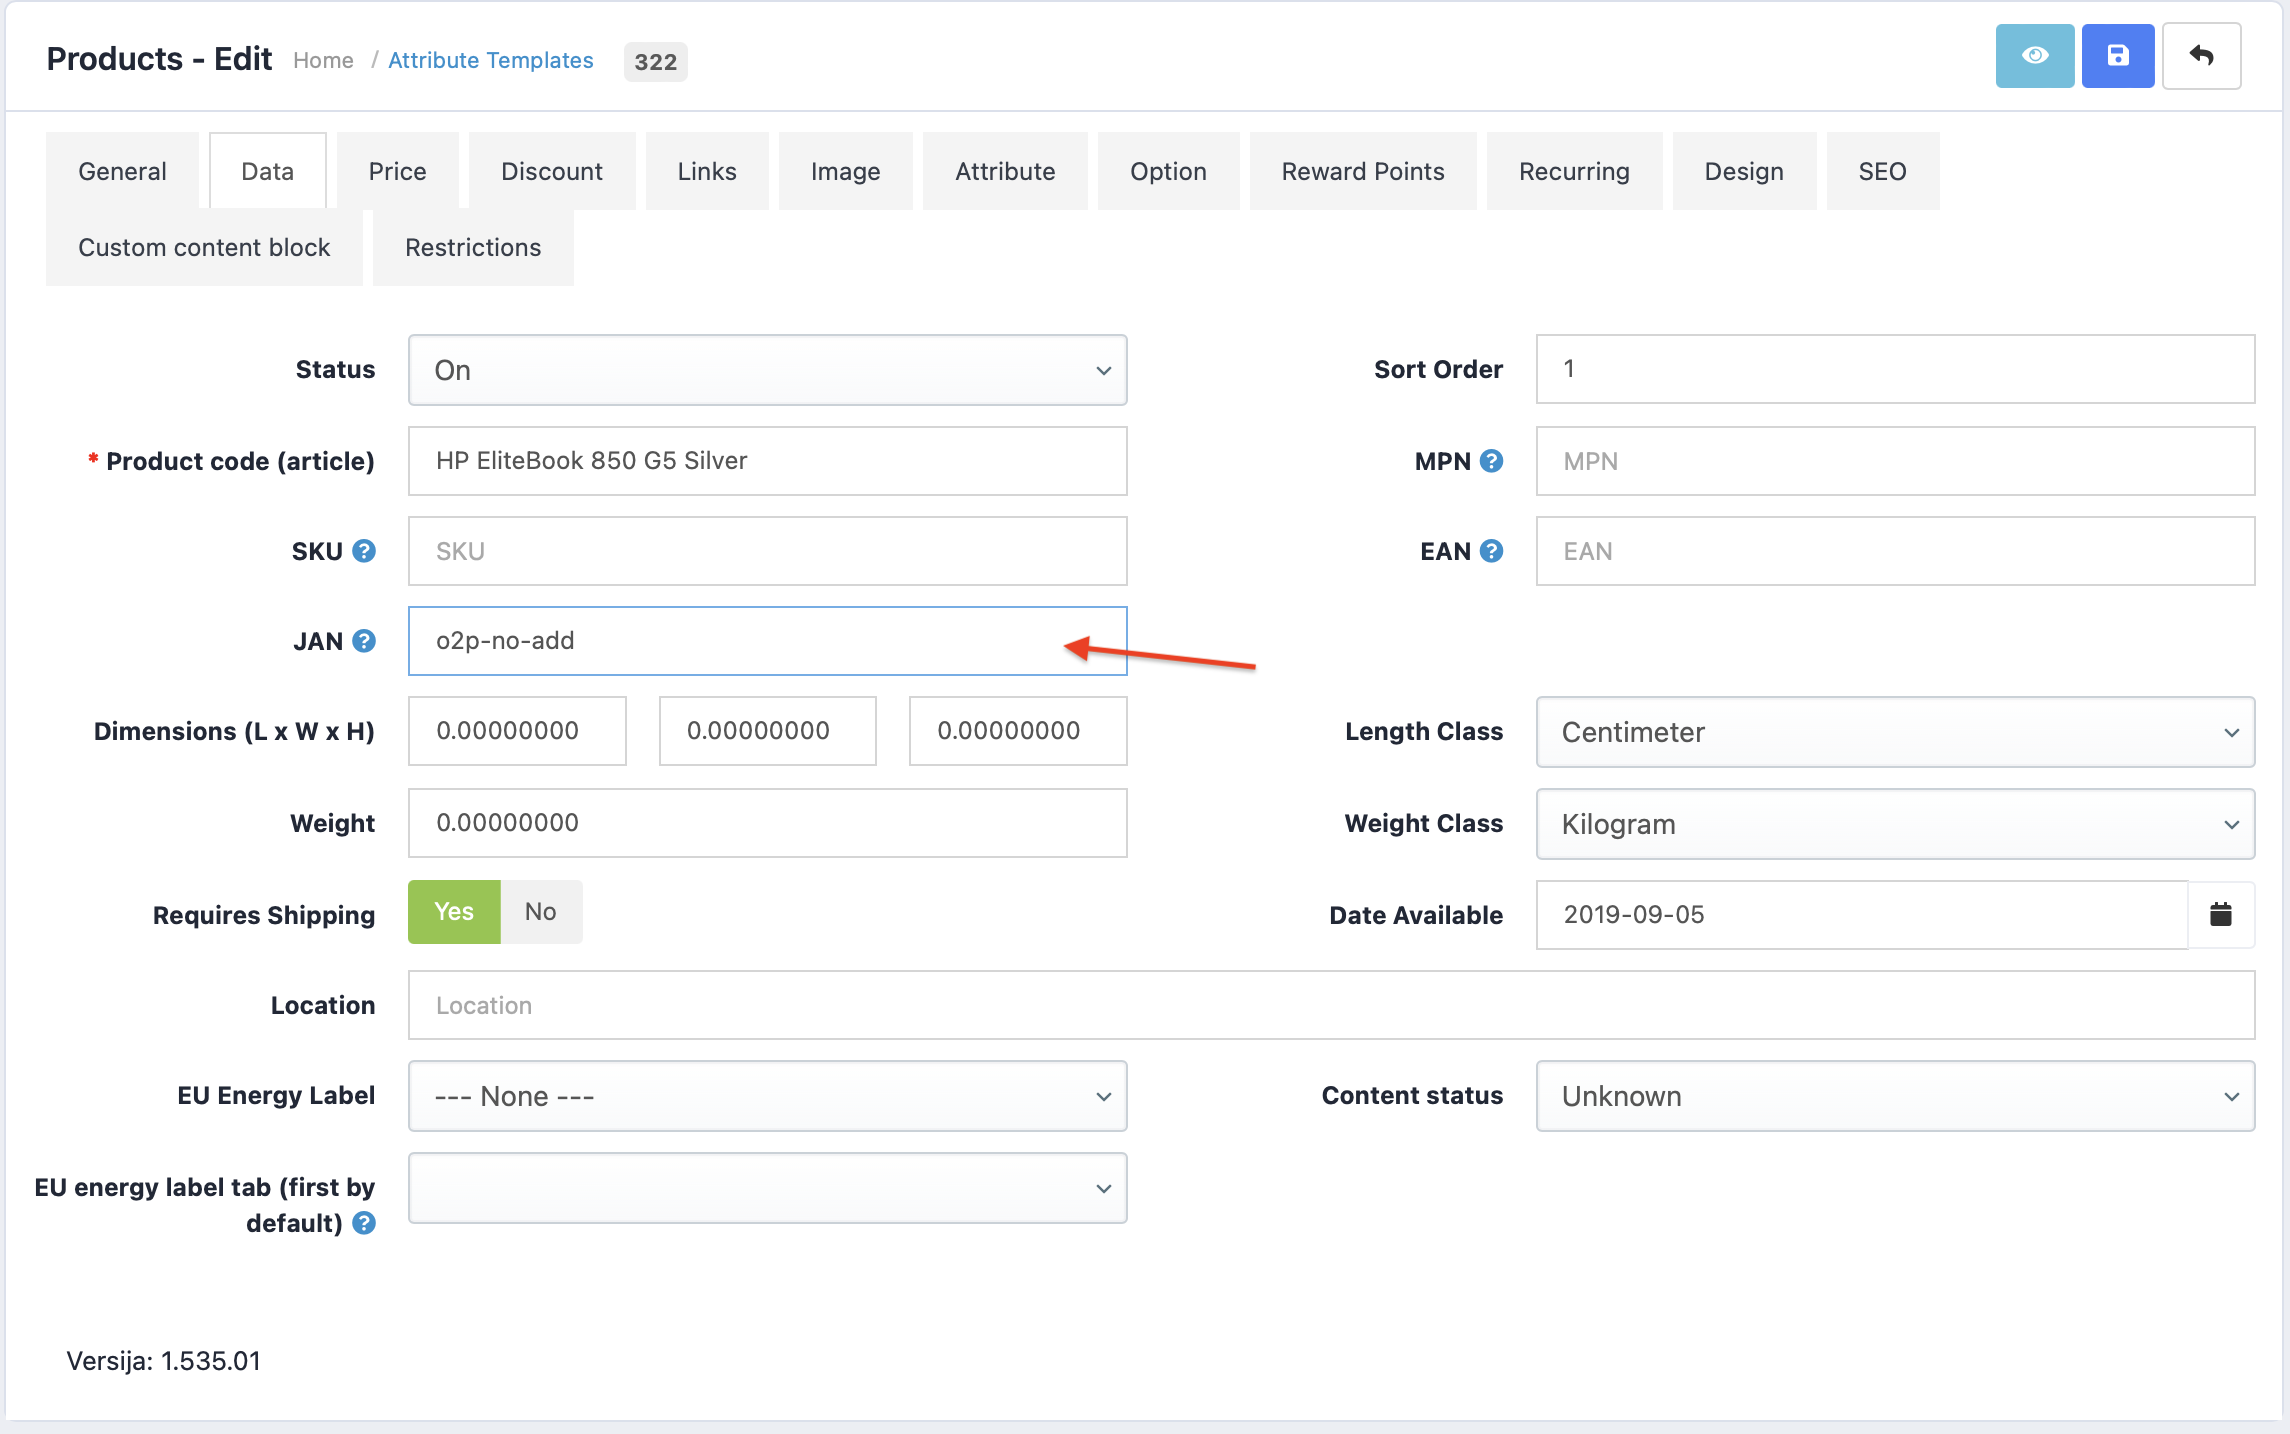
Open the main product, to which You wish to add the options.
Open the Data section and in the JAN field enter: o2p-no-add.
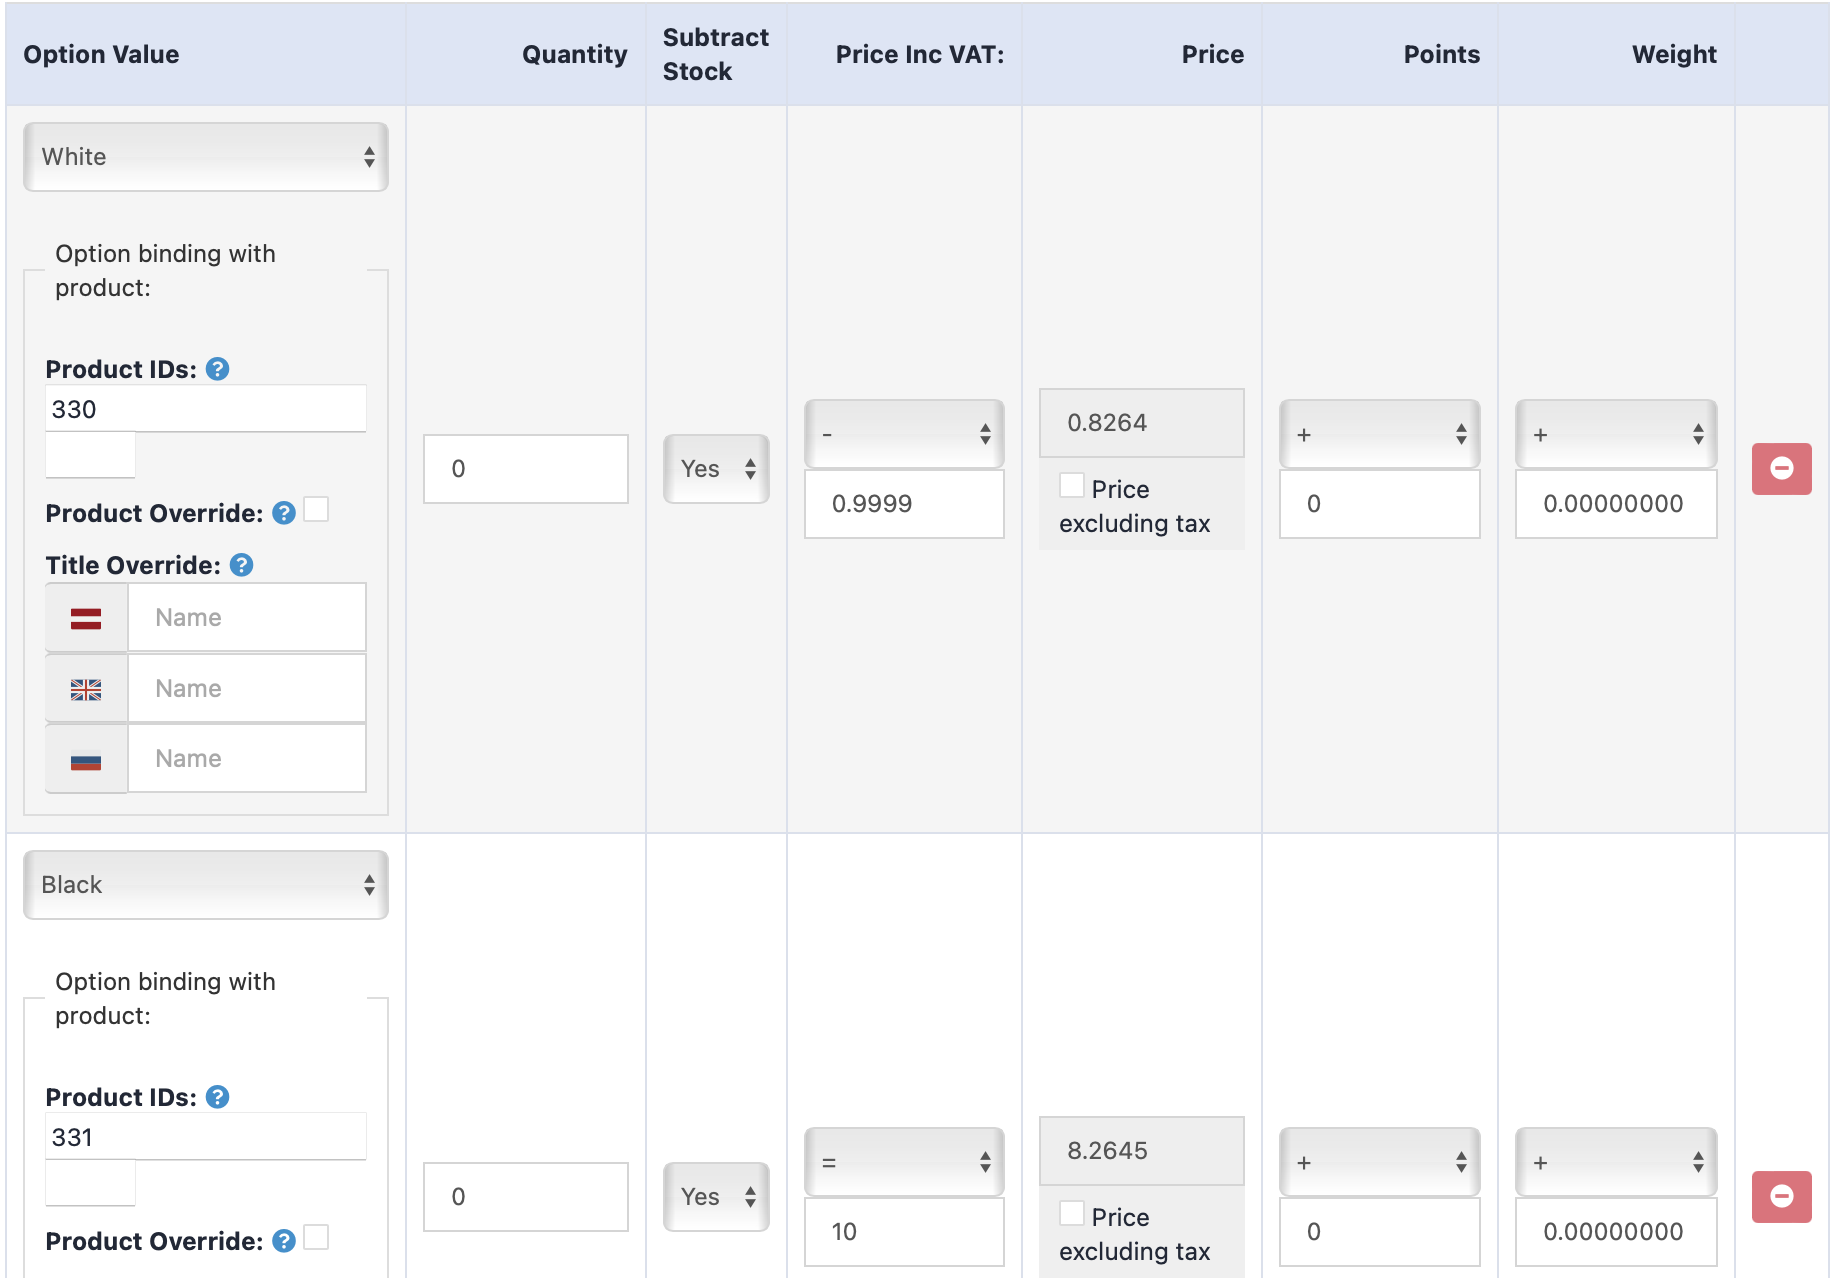
Then continue to the Options section and indicate the same variants.
In the products ID field You must enter the ID of the option products.
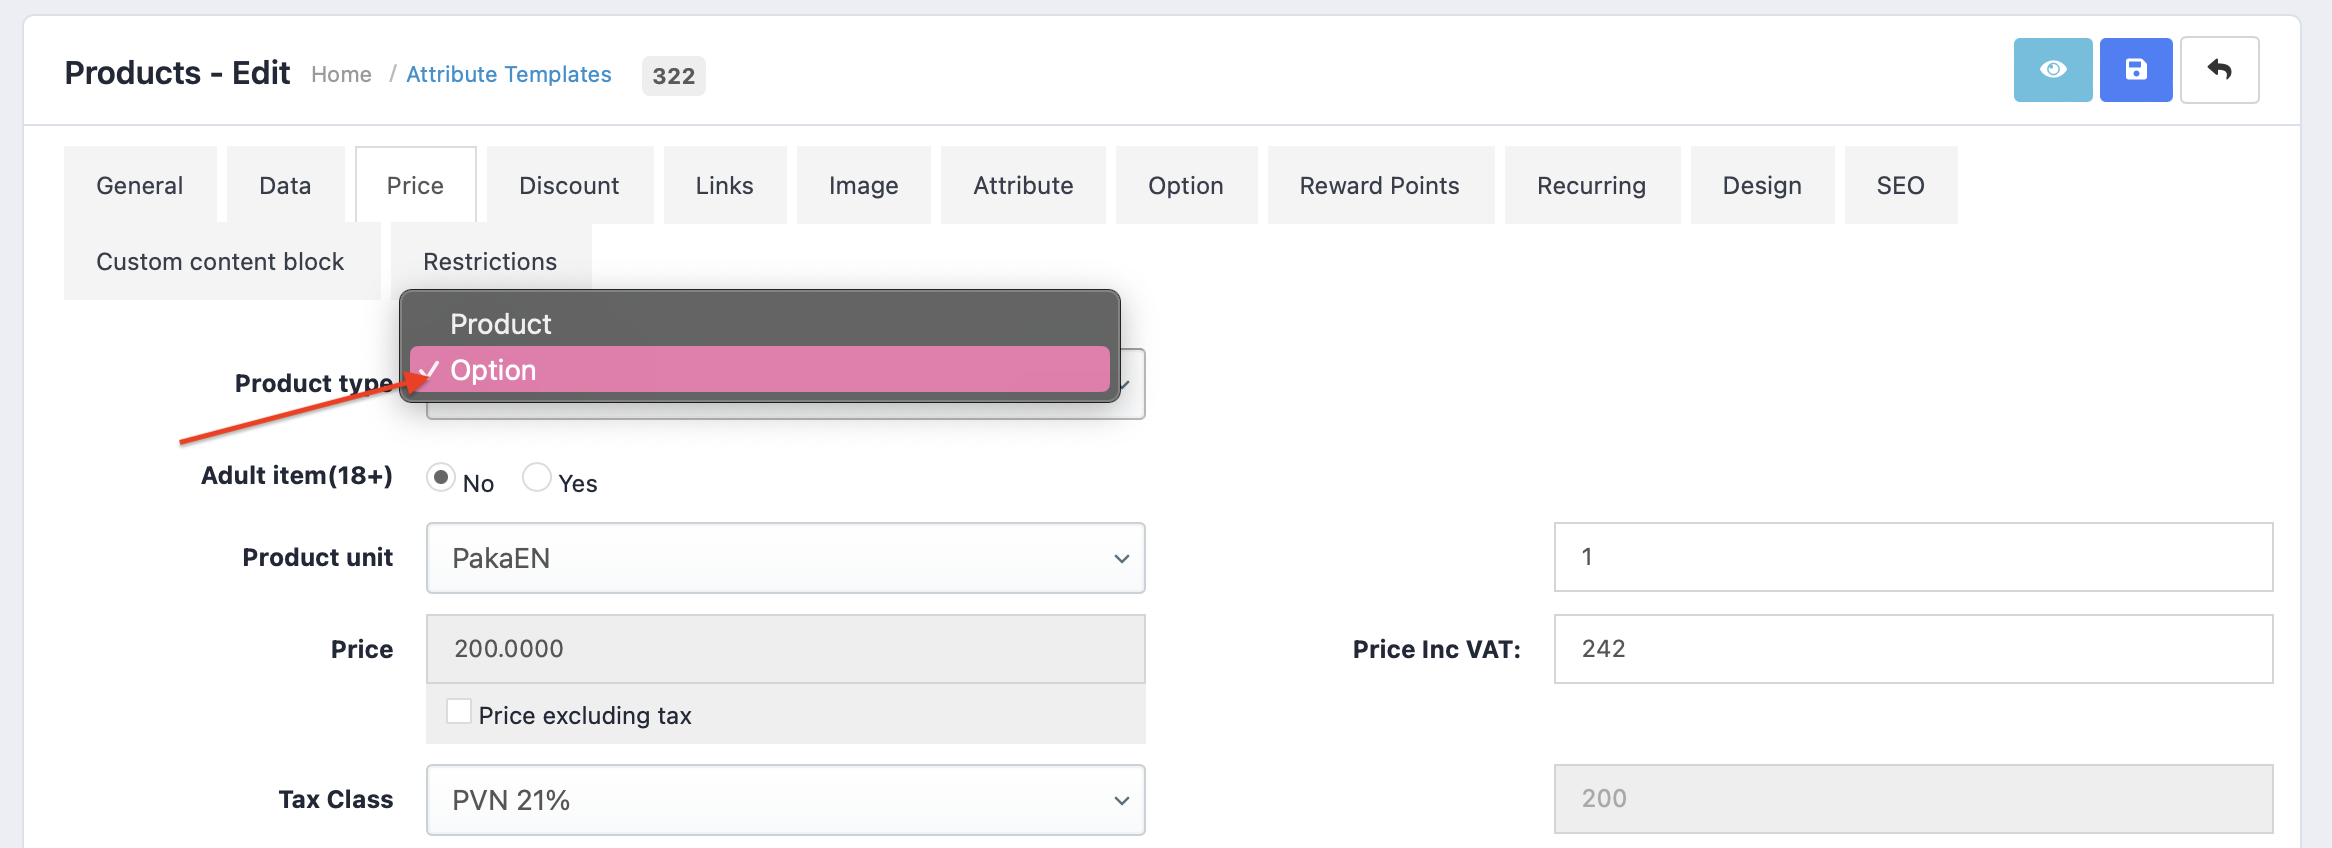
To define the actual option product – complete these steps.
Open the desired product and in the Price field indicate, that the Product type is Option. If this will not be defined, it will show up as a simple product.